Notes includes Windows subsystem Linux, VMWare Virtual machine, remote cloud and dual system.
WSL Initialization
Before starting everything, make sure your Windows version support WSL function and enable it.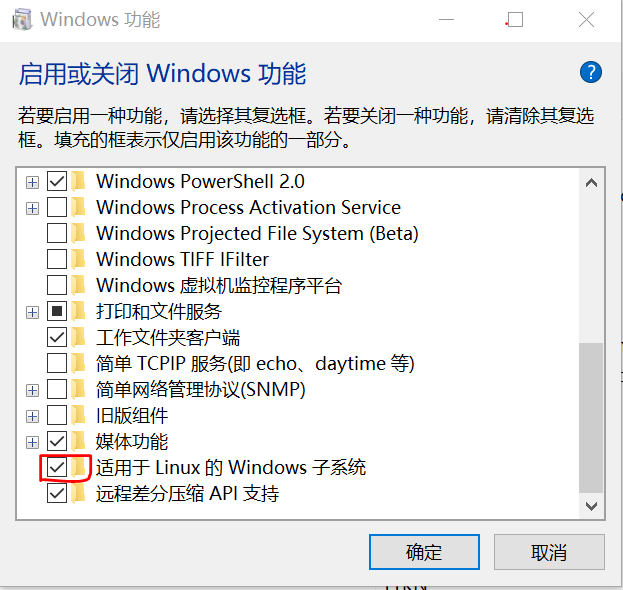
(Also, you can use Powershell to enable it. the powershell command is Enable-WindowsOptionalFeature -Online -FeatureName Microsoft-Windows-Subsystem-Linux)
Enter Microsoft Store and find a Linux distribution install, and then launch it then you will see (You can either click the software icon in start menu, or just open a cmd/powershell and type bash or wsl)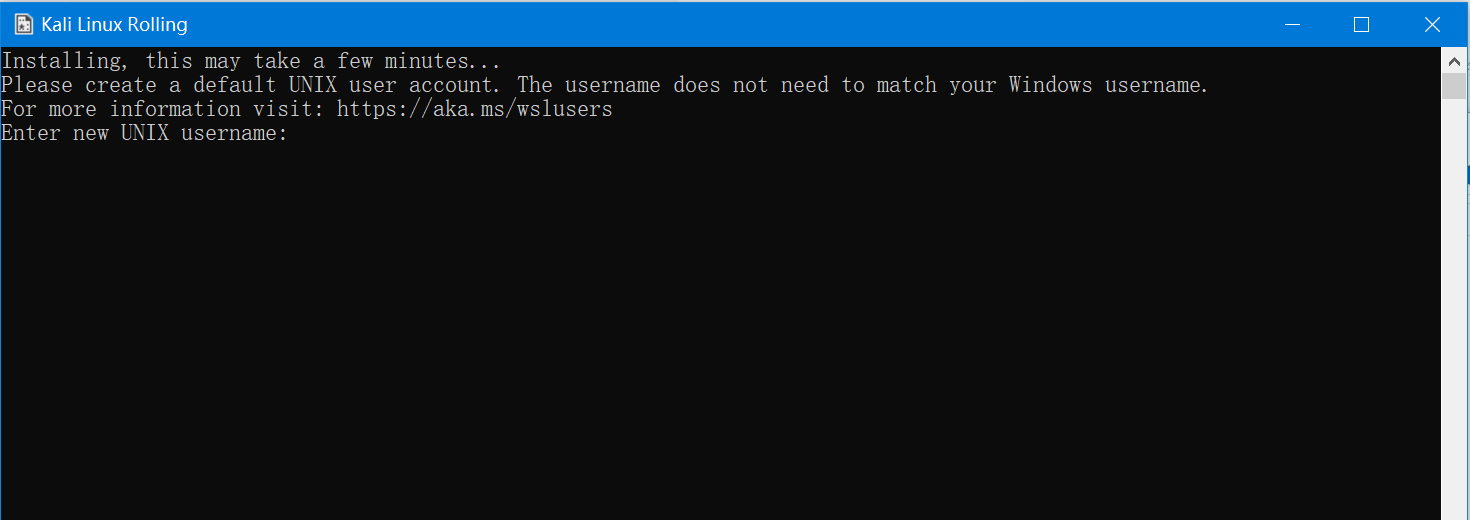
If you don’t want to stay in cmd or powershell, just use wsl [Linux command] as an interface.
1 | ~$ cat /proc/version |
to see the system version or use lsb_release -a for Ubuntu.
System configuration
check for updates
1 | sudo apt update -qq |
set root pass
1 | sudo passwd root |
对于Server用户, 可能会出现没有通过认证的情况. 解决办法参考这篇文章: https://www.codevoila.com/post/26/fix-authentication-token-manipulation-error-when-changing-user-password-in-ubuntu
Access Windows Files
under /mnt/
It’s more convinient to setup a symbolic link
1 | ln -s /mnt/c/Users/Shane/Downloads/ |
static network config for Ubuntu 18.04 LTS
/etc/netplan/50-cloud-init.yaml
1 | network: |
1 | sudo netplan apply |
static network config for Ubuntu 14.04 LTS
edit /etc/network/interfaces
Ubuntu socks5 proxy setting
1 | sudo apt-get install tsocks |
edit /etc/tsocks.conf
1 | local = 192.168.122.0/255.255.255.0 |
1 | sudo -s |
Install vim
1 | sudo apt install vim |
我们需要从VIM中将内容复制到系统剪切板里, check
1 | vim --version |
查看clipboard前面是否有+号. if true, then use "+y for yank and "+p for paste.
更改默认镜像源(Optional, for users suffering slow update speed)
备份系统原镜像源
如果在安装的时候选择的区域为中国,那么默认镜像源是阿里云,也可以改为其他的,比如学校教育网连接清华的软件源速度也是不错的。修改文件在/etc/apt/sources.list中,修改之前记得先备份。
1 | sudo cp /etc/apt/sources.list /etc/apt/sources.list.bak |
/etc/apt/sources.list
1 | # 默认注释了源码镜像以提高 apt update 速度,如有需要可自行取消注释 |
VMWare users: 安装 open-vm-tools
VMWare 官方建议用以替代 vmware tools,
1 | sudo apt install open-vm-tools |
也可以手动安装. 下载网址:https://github.com/vmware/open-vm-tools
在root用户下运行vmware-install.pl,然后疯狂地回车。
参见网址:https://kb.vmware.com/s/article/2073803
配置PuTTY登陆(For linux server users, not for WSL)
1 | sudo apt install net-tools |
一般ssh就会启动,可以使用命令
1 | sudo ps -e |grep ssh |
查看。
若没有开启,输入
1 | sudo service ssh start |
开启。
产生密钥对
Create the pair of key on local computer by the command ssh-keygen -t rsa. Then a directory ‘~/.ssh’ will be found with files ‘id_rsa’ and ‘id_rsa.pub’.
PuTTY client on windows
After you get an SSH private key from Ubuntu server:
- Open PuTTYGen and load our private key.
- Choose “Save Private Key” as a .ppk file and then close PuTTYGen.

- enter Connection > Data > Auto-login username, then input your username.

- Go to Connection>SSH>Auth, browse your private key for authentication.

- Don’t forget to go back to Session>Save

设置共享文件夹(For VMWare users, not for WSL)
首先在VMWare中设置共享文件夹,然后再虚拟机上运行下面的命令就能看到共享文件夹名了。
1 | vmware-hgfsclient |
进入/etc/systemd/system目录
1 | sudo vi /etc/systemd/system/mnt.hgfs.service |
添加
1 | [Unit] |
保存后使能这个service
1 | sudo systemctl enable mnt.hgfs.service |
如果没有创建sudo mkdir -p /mnt/hgfs文件夹,需要创建
1 | sudo mkdir -p /mnt/hgfs |
重启后检查共享目录是否已经挂载到/mnt/hgfs目录下.
与 Windows 时间同步(For BiSystem users)
只对于硬盘安装的双系统来说,会有这个问题。注意Linux是否遵循UTC时间的这个问题。UTC是世界标准时,如果系统遵循这个时间,那么获取BIOS的时间后,会在实际显示时根据所在时区进行相应计算调整。如果不遵循UTC,那么系统显示时间直接就是BIOS的时间。对于虚拟机系统一般没有这个问题。如果出现问题,解决办法如下:
1 | sudo apt install ntpdate |
这样就设置为和Windows时间一样了。然后再将统一后的时间更新到BIOS固件上:
1 | sudo hwclock --localtime --systohc |
中文输入法(For Chinese-typing users)
如果安装的是虚拟机系统并且能登陆谷歌,中文输入法不太必要。如果只有一个操作系统有安装中文输入法的必要,建议首先在右上角的System Settings > Region & Language > Input Sources 中加入Chinese。然后点击 Manage installed languages 按钮,系统就会自动安装相应的语言包和输入法了。输入法系统默认是IBus(Intelligent Input Method),也可以选择XIM(搜狗输入法)。但是,安装了中文输入法后很可能会出现卡机的情况,这可能是个系统的bug。
关闭sudo密码(For lazy users)
1 | sudo visudo |
进入nano编辑器,找到
1 | %sudo ALL=(ALL:ALL) ALL |
修改为不需要密码
1 | %sudo ALL=(ALL:ALL) NOPASSWD:ALL |
然后就可以保存退出了(Ctrl+x)
Modifying rm command(Optional)
rm is a really really dangerous command for UNIX-like systems. Luckily, we may modify this command to let it not directly delete one file but move it to the trash where the location in Ubuntu Desktop System is ~/.local/share/Trash.
sudo apt install trash-cli
vi ~/.bashrc
add alias rm="trash" to the end, then :wq. After restart a new terminal, you can directly use rm file or rm directory to move the file to the trash. (Note: If you add after .profile file, it will take effect only once even if you source it. )
Command line enhancing
Hyper
install Hyper on your Win10, and change the default shell to wsl shell: 'C:\\Windows\\System32\\bash.exe' on file ‘.hyper.js’.
and set shellArgs: ['~'] for starting default at WSL $HOME directory.
添加右键使用 WSL 打开
打开注册表,新建 \HKEY_CLASSES_ROOT\Directory\Background\shell\WSL
在WSL下新建command将bash的运行路径添加进去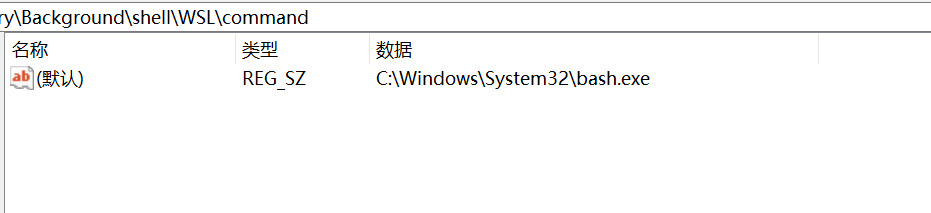
可以在WSL下添加一个Icon的字符串值,将图标路径加入进去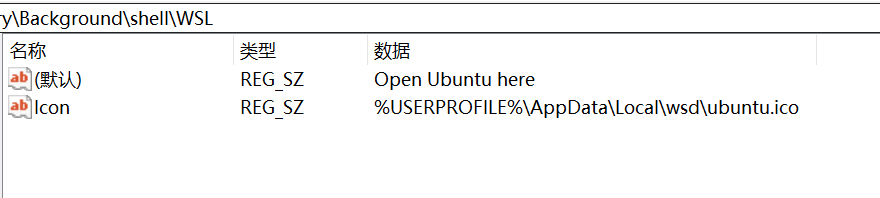
不需要的时候,将WSL文件夹删除就好了(其实在文件管理器的地址栏输入bash,cmd或powershell就能在当前路径下进入对应的终端)
桌面系统增强
奇怪的中文字体
下载安装开源的文泉字体系.
如果遇到中文显示为日文字形的,是因为没有配置字体显示优先级。
在 /etc/fonts/conf.d 或 /etc/fonts/conf.avail 或 ~/.config/fontconfig/conf.d 文件夹下新建 64-language-selector-prefer.conf
里面配置:
1 | <?xml version="1.0"?> |
安装Gnome Tweak Tool
这是一个基本的增强工具,比如启用“单击时最小化”(Minimize on click)就可以直接在Tweak中设置
安装命令
1 | sudo apt install gnome-tweak-tool |
设置Docker
Dock就是Ubuntu下的菜单栏。Settings下面有一些基本的设置,如果想进一步设置,需要安装
1 | sudo apt install dconf-tools |
再命令行中输入dconf-editor打开配置编辑,然后进入
org->gnome->shell->extensions->dash-to-dock进行更加细节化的修改,我这里修改了一个最大化时全屏:
autohide-in-fullscreen
当然,所有的设置都可以通过命令来完成。下面的命令将会把Dock变成MacOS类似的底部居中形式
1 | gsettings set org.gnome.shell.extensions.dash-to-dock extend-height false |
如果想回到原来的状态,通过gsettings reset命令,比如下面命令将Dock大小重置
1 | gsettings reset org.gnome.shell.extensions.dash-to-dock dash-max-icon-size |
1 | sudo apt install gnome-shell-extension-dashtodock |
GNOME Tweak Tool > Extensions > Dash to Dock > Appearance
设置窗口按钮位置为左上角
打开dconf-editor org–>gnome–>desktop–>wm–>preferences–>button-layout 改为
‘close,minimize,maximize:’
Minimize single window applications on click
‘’’
gsettings set org.gnome.shell.extensions.dash-to-dock click-action ‘minimize’
‘’’
or set in Tweak Tool
安装多媒体编解码器(Codecs)
1 | sudo dpkg --configure -a |
编程环境搭建
C/C++
1 | sudo apt install build-essential |
Python环境的安装
1 | sudo apt install python3 python3-pip |
Install numpy for system
1 | sudo apt install python3-scipy |
使用国内镜像源
Python3 pip使用国内镜像源:新建~/.pip/pip.conf
1 | [global] |
或者在安装时加入
1 | -i https://pypi.tuna.tsinghua.edu.cn/simple |
OpenCV
https://docs.opencv.org
choose the version that you’ve downloaded. for unzip, install unzip or 7zip.
If there is error like “E: Unable to locate package libjasper-dev”. Use these commands to search and select the correct name:
1 | sudo apt update -qq |
cmake for supporting gstreamer
1 | sudo apt install libgstreamer1.0-dev libgstreamer-plugins-base1.0-dev |
Texlive
1 | sudo apt install texlive-full |
GNUPlot
Deep Learning
Miniconda
1 | ~$ sudo apt install bzip2 -qq |
If you choose not to initialize Miniconda3 in your ~/.bashrc(which will override system python), you can do it yourself by adding export PATH="~/miniconda3/bin:$PATH" to .bashrc of your home directory. Then reopen your terminal.
Opencv for Python
1 | conda install -c menpo opencv |
Jupyter notebook
1 | conda install jupyter |
PyTorch
https://pytorch.org/get-started/locally/
matplotlib
1 | pip install matplotlib |
另参考:
https://linuxconfig.org/things-to-do-after-installing-ubuntu-18-04-bionic-beaver-linux
Comments
shortnamefor Disqus. Please set it in_config.yml.